|
by Lauren Silverman '17 David Bowie was a multitalented artist whose eccentric, androgynous appearances caught the attention of the entire world. This makeup tutorial was inspired by both the color schemes of his album art as well as Bowie’s general luminescence. Follow the guide and video below to learn how to create this (mostly) wearable look! All of the eyeshadows I used are from either Urban Decay’s Naked 2 or Electric Palettes. There is a product list at the end of this article. *I filled in my eyebrows before starting the eyeshadow, but this is optional. 1. Because you will be using using some colors rather than just nudes, prime your eyelids before starting. It’s not necessary, but you may find that eyeshadow stays longer and creases less on top of primed eyelids. 2. Let the primer dry for about thirty seconds. Take an orange color- any type of orange will do- and apply it to your crease. Make sure to cover your entire crease and blend it upward toward your eyebrow. 3. With the same brush, apply a brown shadow over the orange. Blend it less so the orange is still visible on top. 4. Take a silver or white eyeshadow and apply it all over the lid. 5. Using the same brown eyeshadow as before, apply it to the outer corner and blend toward the center of the lid. Then take a black eyeshadow (ideally matte) and apply it over the brown in the outer corner as well. Blend it up into the crease, but do not let the black overpower the orange that is already there. 6. Take a flat brush and apply a light blue to the inner crease- it should start around the halfway point of your crease and go to your inner corner (NOT on the lid). Blend to soften harsh color transitions. 7. A brow highlight is optional but highly recommended. Take a shade lighter than your skin tone (a highlight color from a contour kit will work) and line the bottom of your eyebrow with it, blending into the crease. 8. Now take a light white or silver eyeshadow to use as your inner corner highlight- it should be lighter than your lid color (and hopefully more glittery). Apply it to the inner corner of your eye and around to your lash line. Gently press it onto your entire lower lash line (just below your bottom lashes, not above). 9. Next, line your eyes with a white eyeliner. This step depends on what kind of eyeliner you prefer to use. You may use a pencil, but keep in mind that it is harder to create an eyeliner wing with a pencil applicator. I recommend either liquid or gel to make the best wing. I actually used liquid lipstick as my eyeliner for this look, applying it with an angled brush. (A note on using lipstick on the eyes: Make sure your lip product is eye-safe before applying it anywhere in the eye area. Products not meant for the eyes may yield unwanted results.) 10. Create a wing at the end of your eye using the same eyeliner. 11. Use a black pencil eyeliner and apply it to your waterline- this is the area just above your lower lashes. 12. From the end of the eye, guide a thin line of black eyeliner under the white wing you made in step 10. You should make a line that just traces the wing that is already there- try not to extend it. (I recommend liquid liner for this step.) 13. What would a Bowie-inspired makeup look be without glitter? Using loose glitter or glitter eyeliner, cover around the outer half of the white eyeliner, starting from the wing and gradually tapering off in the middle of your eye. Make sure it is most opaque on the wing to create an ombre-like effect. After this, put on some mascara to complete the look. Any color will do, but I used black. PRODUCT LIST -Urban Decay Primer Potion in “Anti-Aging” -Urban Decay Electric Pressed Pigment Palette (“Slowburn,” “Gonzo,” and “Revolt”) -Urban Decay Naked 2 Palette (“Busted,” “Verve,” “Blackout”) -Jeffree Star Velour Liquid Lipstick in “Drug Lord” -Urban Decay 24/7 Glide-On Eye Pencil in “Perversion” -Kat Von D Tattoo Liner in “Trooper” -Urban Decay Heavy Metal Glitter Eyeliner in “Spandex” -Urban Decay Perversion Mascara
0 Comments
by CristaMarie DeVito '17 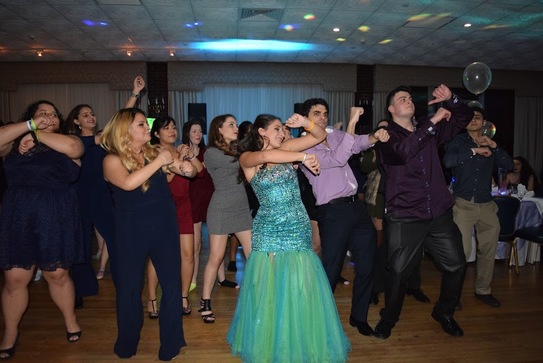 Line dances are something that has been around forever. Some of the most popular line dances today are the Macarena, Cha Cha Slide, Cotton Eye Joe, Cupid shuffle, Wobble, and the Whip. These dances are most popular during social gathering such as Sweet 16s, weddings, and graduation parties.
A line dance is a choreographed dance, performed by a group of people, consisting of a repeated, or similar sequence of steps. During a line dance, the group either faces each other or the same direction. Another form of group dancing is “circle dancing” which is probably the oldest form of dancing and became popular when public dancing did. Circle dancing was created in order to bring the community together to celebrate and rejoice customs and traditions within the community. Line dancing differs from circle dancing because there is no actual physical contact during a line dance. An example of how a line dance may consist of different steps throughout a song in a similar manner is the Cha Cha slide performed to the song “The Cha Cha Slide” by Mr. C The Slide Man. During this song, Mr. C narrates the steps being done. On the other hand, some line dances, such as the Cotton Eye Joe, are a continuing series of steps danced to a song that does not explain the moves. Line dances are a way to bring people together to dance and celebrate. This form of dancing goes back centuries ago and continues to be part of parties today. To learn how to do some of these popular line dances, Youtube links to instructional videos are listed below. Instructional Videos: Macarena: https://www.youtube.com/watch?v=neqGdK8qAxQ Cha Cha Slide: https://www.youtube.com/watch?v=wZv62ShoStY Cotton Eye Joe: https://www.youtube.com/watch?v=7syj6kp1Y0g The Cupid Shuffle: https://www.youtube.com/watch?v=Of4K4cq_n88 The Wobble: https://www.youtube.com/watch?v=8vTIY0xHBUg The Whip: https://www.youtube.com/watch?v=jPRJ4rnKfe8 by Gabriella Agliata '19
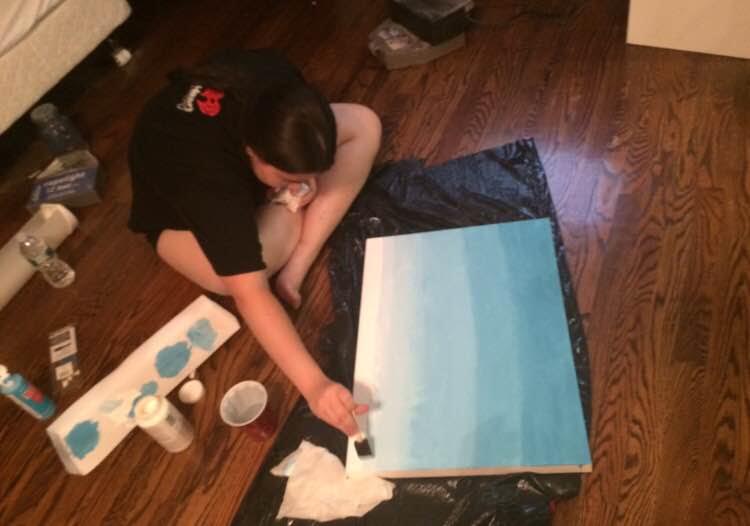
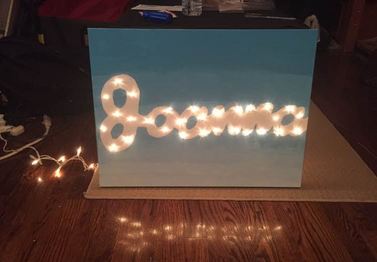
Having an organized locker is a big component of having a complete, structured routine. However, it can be hard to maintain, especially if you’re the type of student that talks to her friends by her locker and loses track of time, causing you just to throw the books in there. Over time, the books will accumulate in your locker making it hard to exchange them when you're trying to get to class. Before beginning the process of organizing a locker, something to think about getting is a locker shelf. Locker shelves can make changing books between classes much easier and provide more room. Once you get all the things you need to put in your locker, sort your supplies into categories. Start off with folders, then move in textbooks, notebooks, and so on. This order can be rearranged, but it’s important to try and keep all similar supplies together for easier access. Another good method is to keep all supplies used for one subject together. For example: math folders, textbook, and notebook would all be placed next to each other in the locker. Don’t forget to decorate it as well! Decorations will make your locker more visually appealing. Some extra tips are putting some pictures of family and friends and a white board for reminders. 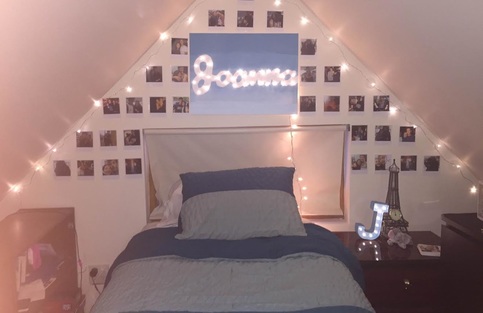 By Joanna Colasanto '17
By Mary Petrosino '17
By Kori Faraj '172016 is quickly approaching, I’m sure you want to ring in the new year with a standout set of eyebrows. They are the is the key to a polished face. Unfortunately, not all of us are born with naturally full eyebrows. Don’t be upset because there is a way to create perfect brows!
Products Needed: Brow Pencil or Brow Dip(Suggestions: Revlon Eyebrow Pencil, E.L.F. Brow Dip, Anastasia Beverly Hills Dipbrow, Anastasia Beverly Hills Eyebrow Pencil) Eyebrow Highlighter(Suggestions: Anastasia Beverly Hills Eyebrow Highlighter or concealer lighter than your skin tone) Blending Brush Eyebrow Comb Brow Gel (Suggestions: Brow Drama by Maybelline, Anastasia Beverly Hills Brow Gel) In order to achieve full eyebrows, perfect square shape and arch, you need a eyebrow pencil or eyebrow dip. You can use brand eyebrow pencil or eyebrow dip. It all depends on the balance of your hand and how consistency while drawing the shape. If you want your shape to look defined, you can highlight your brows. Highlight around the shape of your brows. For a defined look, blend it in around your brows using a blending brush. A blending brush has to be extremely tiny in order to the little spaces around your brows. In order to achieve a more natural look, use a eyebrow comb and brow gel. Use the brow gel over the hairs. It makes your eyebrows appear fuller than they actually are and locks the hairs in place. 5 Simple Steps:
Where you can find these products: http://www.sephora.com/ http://www.anastasiabeverlyhills.com/ http://www.urbandecay.com/ By Lauren Silverman '17 Autumn is in full swing, and that means warm colors are back in style. Darker, warmer colors may seem intimidating at first, but with this tutorial you will be able to confidently pull off a toasty smokey eye!
(Recommendation: Urban Decay’s Primer Potion.) Also, before I apply any eyeshadow, I fill in my eyebrows. This is optional, but will truly complete your look. There are many different ways to do your eyebrows- you may use a pencil, powder, or pomade. They mostly depend on personal preference, with pencil being the lightest and easiest to apply and pomade being thicker and more difficult. There is no need to go overboard; just follow the shape of your natural eyebrows to bring out their fullness. (Recommendations: PENCIL: Anastasia Beverly Hills Brow Wiz POWDER: Urban Decay Brow Box POMADE: Anastasia Beverly Hills Dipbrow) 2) Crease color Now we are ready to begin. Using a crease brush, apply an orange color to your crease and blend upward. Make sure you do this lightly. The orange will serve as a base for the next pigment applied. (Recommendation: Urban Decay Slowburn) 3) Crease color continued Using a crease brush, apply a brown eyeshadow on top of the orange and blend it out so just a bit of orange shows through. You may use any type of brown, whether it is matte or shimmery. (Recommendation: Urban Decay Busted) 4) The eyelid Switch to a flat eyeshadow brush for the lid. Starting in the center, apply either a white or silver color and blend lightly over the rest of the eyelid. Make sure most of the pigment is in the middle. (Recommendations: Urban Decay Verve or Polyester Bride) 5) Outer and inner corners Now that your lid is lightly covered, take a warm, rich gold and pat it into the outer and inner corners of your eyes. Blend it into your white/silver eyeshadow. (Recommendation: Urban Decay Half Baked) 6) Outer corner continued You’re almost finished! Using your crease brush again, lightly apply a black eyeshadow to the outermost corner of your eye and blend it into the crease. Black eyeshadow can be easily overdone because of its heavy pigmentation, so make sure you’re only using a small bit at a time. You can always make it darker if needed… but not lighter! (Recommendation: Urban Decay Blackout) 7) Brow highlight This step is optional, but will tie together your eyeshadow look. Using a matte shade lighter than your skin tone, trace the bottom of your eyebrow and blend downward into the crease. Highlighting your brow bone will draw attention to your eyebrows and brighten your eye makeup. (Recommendation: Urban Decay Foxy) 8) Finishing touches Now that your eyeshadow is finished, you should line your eyes with a black eyeliner. Whether you should use a pencil or liquid is all about personal preference. You may also want to draw on some wings to add flair. Finally, complete the look with a black mascara of your choice. (Recommendations: EYE PENCIL: Urban Decay Perversion or MAC Pro Longwear Eyeliner in Definedly Black LIQUID LINER: Kat Von D Tattoo Liner in Trooper MASCARA: BareMinerals Lash Domination Volumizing Mascara) Your autumn eye makeup is complete! This look truly gives off a warm fall glow. You may be shivering on 50 degree, high wind days, but at least your eyelids will be nice and cozy. Stay tuned for the next makeup tutorial! By Molly Clark '16 Plums, taupes, bronze, and aubergine. Time time of the year, people’s cosmetic arsenals are just bursting with all of these dark, rich colors ready to show off the feeling of autumn. But how can anyone be sure that they’re going to last all day without turning into a blended muddle of brown, or having to constantly reapply their lipstick after every latte? Have no fear, because this tutorial will make sure that the only thing you’ll need to be frightened by this autumn are the Halloween costumes.
First and foremost, a clean face is a happy face. So be sure to exfoliate regularly, and always wash your face before applying anything. This will help keep your pores from being blocked, and prevents acne breakouts. Next, you’ll need to prime your eyelids. Primer creates a barrier between your eyeshadow, and the natural oils secreted by your skin. It makes the color appear brighter, and keeps your look fresh all day. Urban Decay’s Primer Potion works extremely well, as does the Bh Cosmetics Studio Pro Waterproof Eye Primer. Now that you’re ready to start applying your eye makeup, you should apply to the lid first. Start by using a small angled brush to apply a light champagne color to your inner corner. The light color will make your eyes appear bright and awake, and using an angled brush allows you to have more control over how it is applied. A small fluffy brush should be used next to apply a light taupe to the middle of your lid, and should be applied again on your lower lashline using a blending brush. This color will help provide a transitional color between your outer and inner corners. It will also add depth to your eyes, and allow your lower lashes to pop. After this, you can begin to focus on adding darker colors for added definition. A deep plum is an excellent color to commemorate the season. However, if you are not particularly a fan of the color purple, a brownish-red or deep shade of bronze also adds the same dramatic effect. You should be using an angled brush to apply the shadow to the outer corner of your eye, as well as your small fluffy brush to blend it both outward, and into your lid. At this point, it is also recommended to use your blending brush to to tie together all the shades that are now on your lower lashline. You can also apply a small amount of black to the very outermost corner of your eye for added depth. Of course, this look will always provide you with the option to do a winged eyeliner, so that you might just have wings large enough to fly away from that test you know you could have studied more for. If you do choose to do this, but tend to have poor control over a liquid liner, dipping an angled brush in water and applying black eyeshadow as if it were liquid liner can provide the same effect, but with more control than a gel. Finish your eyes with your usual mascara and eyebrow routine. Now that your eyes are done, you can clean up any fallout from eyeshadow before starting on the rest of your face. Prime your face first so that your foundation can last longer. I usually recommend using Smashbox primers because there are so many variations, which ensures that there is one that will work wonderfully for any skin type. After applying your primer, foundation, and any contouring that you would normally do, apply a peach blush to compliment the look. This color will also add healthy color to your face, which will help you deny the fact that the sun is practically gone by six o’clock. As for your lips, bold colors are a great way to celebrate this autumn. Aubergine, maroon, and bright red are all excellent choices for this look. To keep everything in place, apply translucent powder to your face and lips. This will help set your makeup, and prevent it from shifting. For added assurance, apply some setting spray and wait a minute for it to dry properly. Be very careful when applying setting spray, since too much of it can bring too much moisture to your makeup and cause it to melt off. Keep the bottle about seven inches from your face, and spray twice. |